Create Dataset using CSV
- From this document, you will learn to create a dataset in OPNBI, Moreover, you will learn to make a dataset using CSV(Comma-separated values).
What is CSV?
A comma-separated values file is a delimited text file that uses a comma to separate values & that file is a plain text file that contains a list of data. These files are often used for exchanging data between different application. Each line of the file is a data record. Each record consists of one or more fields, separated by commas. The use of the comma as a field separator is the source of the name for this file format.
Click here to know more about CSV files.
Objectives
- Create dataset using CSV File
Prerequisites
- For this example we are using employees.csv
Download csv.zip file from link given csv.zip
- After downloading the zip file, add it into the OPNBI. To add it into OPNBI follow this Link.
Dataset using CSV: This video contains how to create Dataset using CSV in OPNBI.
Steps to create dataset using CSV
Click on Hamburger Icon & go to Documents Tab.
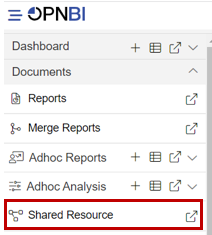
In Documents tab Click on Shared Resource.
In Shared Resource Click on upload, As shown in figure below:

When you click on Upload it will display a screen.
In Upload Files upload a csv file, As shown in figure below:
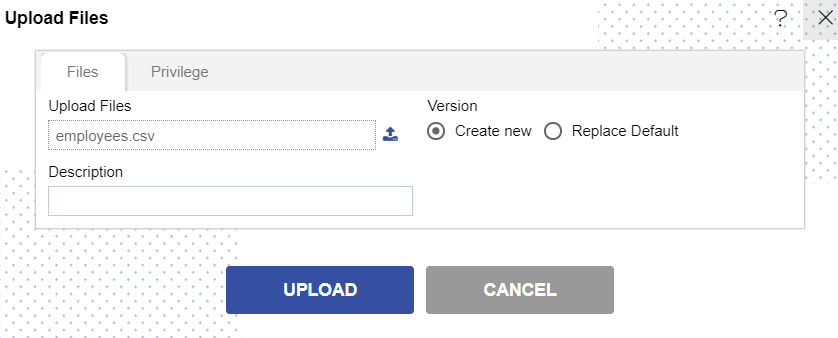
Click on Upload button.
You will get a message, As shown in figure below:

In Master Data Tab click on Dataset.
Click on create dataset, As shown in figure below:
Enter following details in Create Dataset.
- Name: Employee
- Datasource: Existing Files
- Select Employee.csv file in Available to selected.
Fill above details, As shown in figure below:
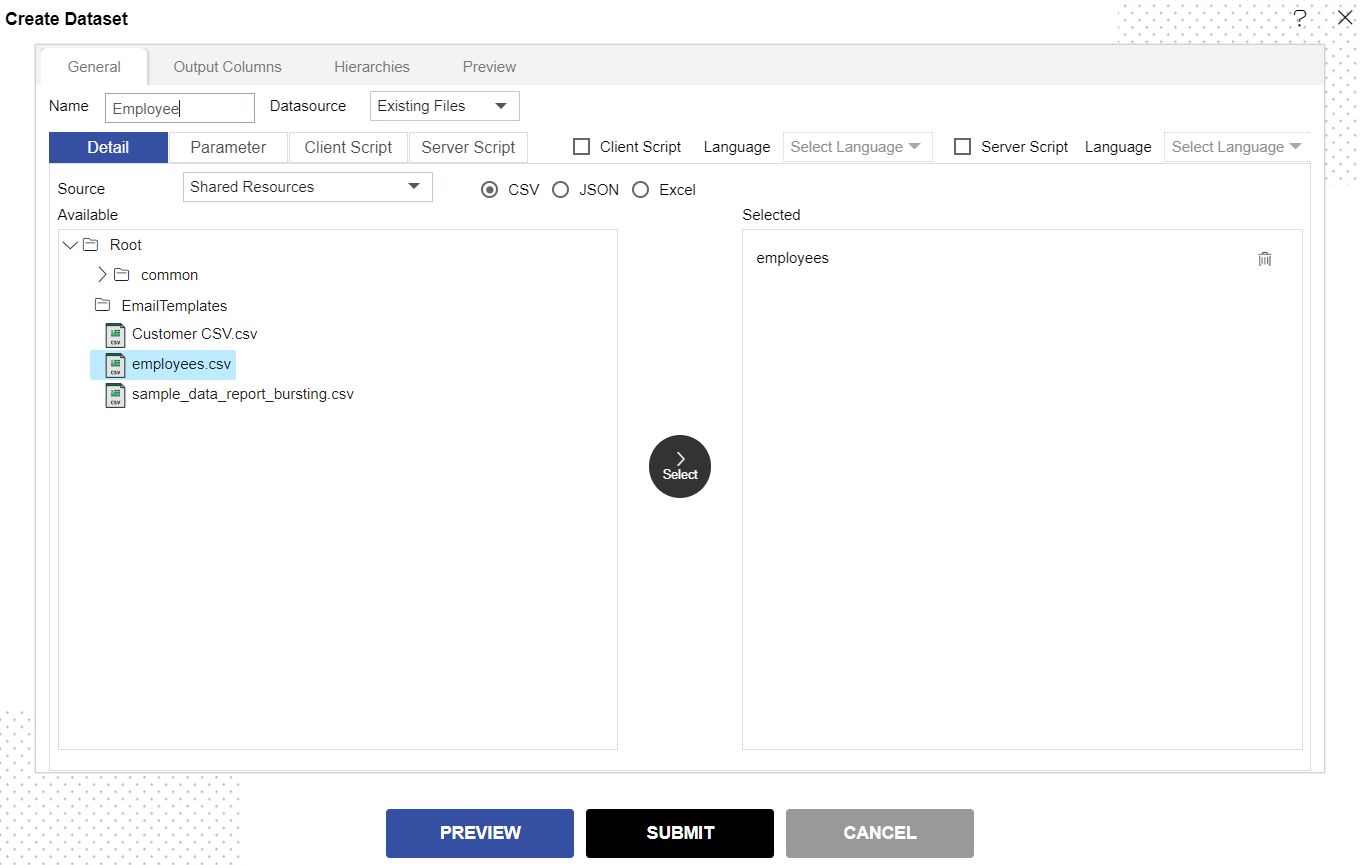
Click on the Select from the center of the screen & then click on Preview and Submit button.
You will see the Employee Dataset, As shown in figure below:

Click on Hamburger menu > Dashboard section & open your dashboard.
- Click here to know hoe to edit dashboard.
From Right Vertical Menu Select the Table Widget icon for this example.
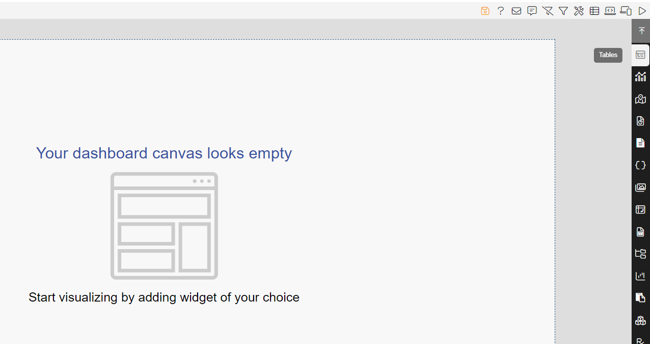
info
- Click here to know more about different dashboard widgets.
The Edit menu box appears as you click Table Widget icon. And a widget gets added in content place automatically in dashboard.
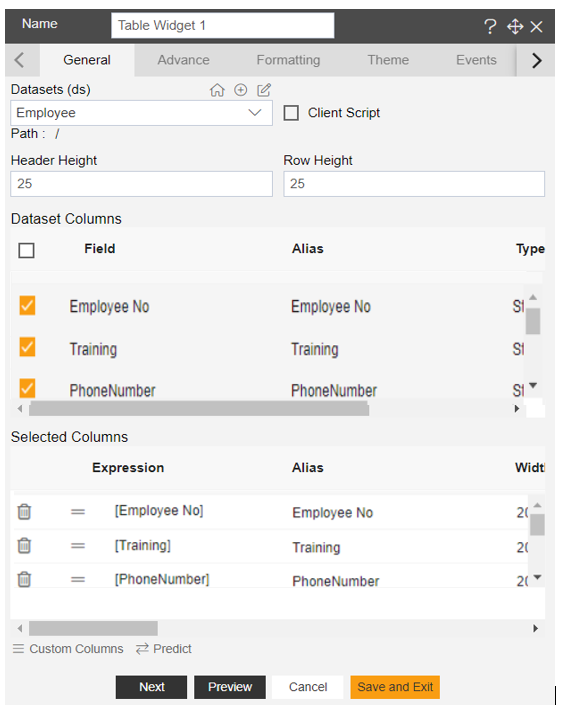
Enter Following Details in edit box, As shown in figure below:
- Dataset: Employee.ds
- Select all the Field in Dataset Column.
Fill above details, As shown in figure below:
Click on Preview and Save and Exit button.
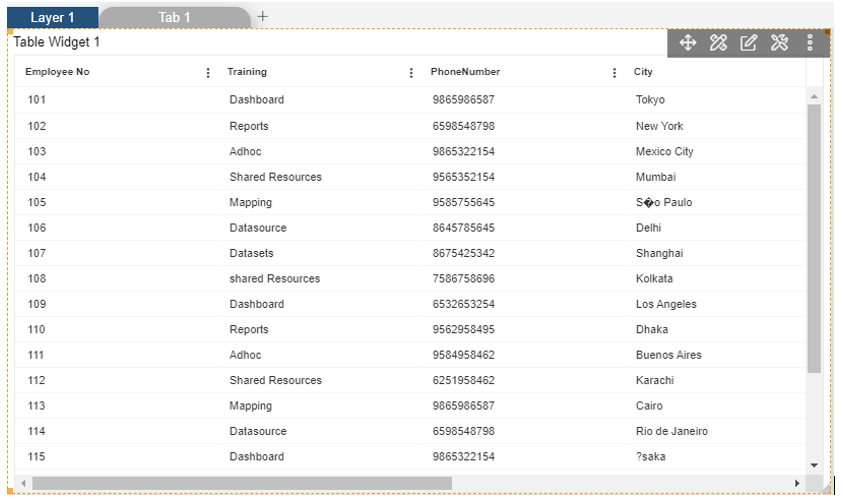
Now, match your Table Widget with the below example, it should look like the figure below:
To know more about how to create dataset using different sources follow below Links:-